
There is a specific sinking feeling that comes with hearing that faint tearing sound. You were removing your unit, or brushing it out, or maybe you just caught it on a hairbrush — and now there is a hole in the lace, right where everyone will see it.
Before you write off the wig, know this: most lace damage is repairable, and a good repair genuinely disappears once the unit is on. Lace has been mended by wig makers for as long as lace wigs have existed. The techniques are not complicated; they just take patience and a steady hand.
Assessing the Damage First
Not every tear needs the same treatment, so start by looking properly. Put the wig on a mannequin head or wig stand under bright light, and hold a piece of white paper behind the lace so the damage stands out.
A small hole or run, under about a centimetre, in an area with hair knotted around it. This is the most common and the easiest to fix — usually a patch job.
A tear along an edge, typically at the temples or where the lace meets the cap. Very common, because this is where tension concentrates during removal. Usually best stitched.
A long split through the middle of the lace, several centimetres. Repairable, but the repair will need to be done carefully and the area will always be a weak point.
Widespread thinning with multiple runs. This is lace at the end of its life. HD and thin Swiss laces are beautifully invisible precisely because they are delicate, and they do wear out. A repair here buys you a few more wears at best.
A tear that has taken the hair with it. If knots have pulled out along with the lace, you can repair the structure but you cannot restore the density without re-ventilating, which is skilled work best left to a professional.
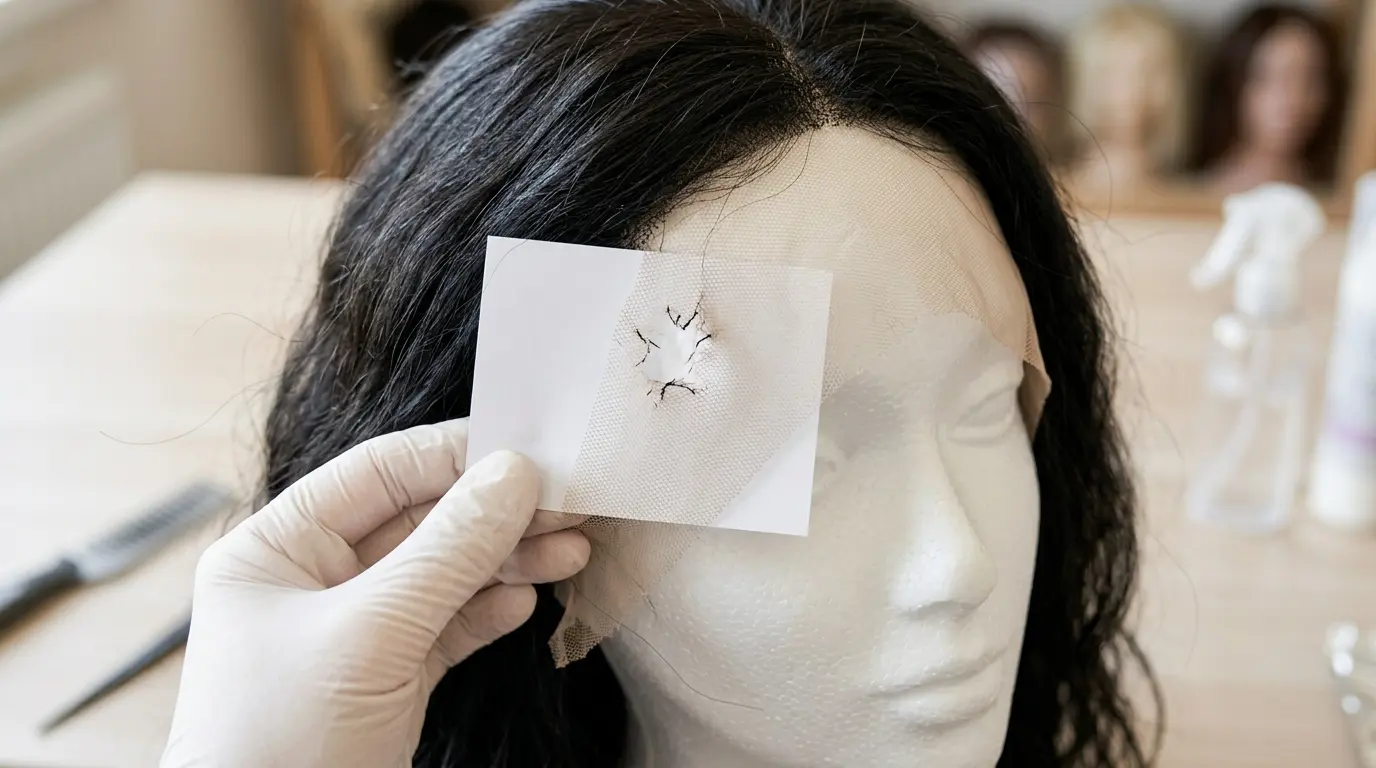
Be honest at this stage. If the lace is fragile across the whole front, a repair in one spot just shifts the stress somewhere else and you will be back with a new tear next week.
Gathering What You Need
You do not need much:
- A mannequin head or wig stand, ideally one you can pin into
- T-pins or straight pins
- A fine sewing needle and thread that matches your lace tone — nylon or fine polyester works; avoid thick cotton thread
- Small sharp scissors
- A scrap of matching lace, if you are patching. Offcuts from when you trimmed the wig are ideal, which is a good argument for keeping them
- A lace-safe adhesive, such as a wig glue or a fabric-appropriate fine-line adhesive
- Tweezers and good light
A note on glue: do not reach for cyanoacrylate super glue. It cures hard and brittle, so the repair cracks the first time the lace flexes, and it can discolour or stiffen the surrounding mesh permanently. Adhesives designed for lace or fabric stay flexible, which is exactly what you need.
The Stitching Method for Tears and Edge Splits
This is the strongest and most invisible repair for anything along an edge or a clean split.
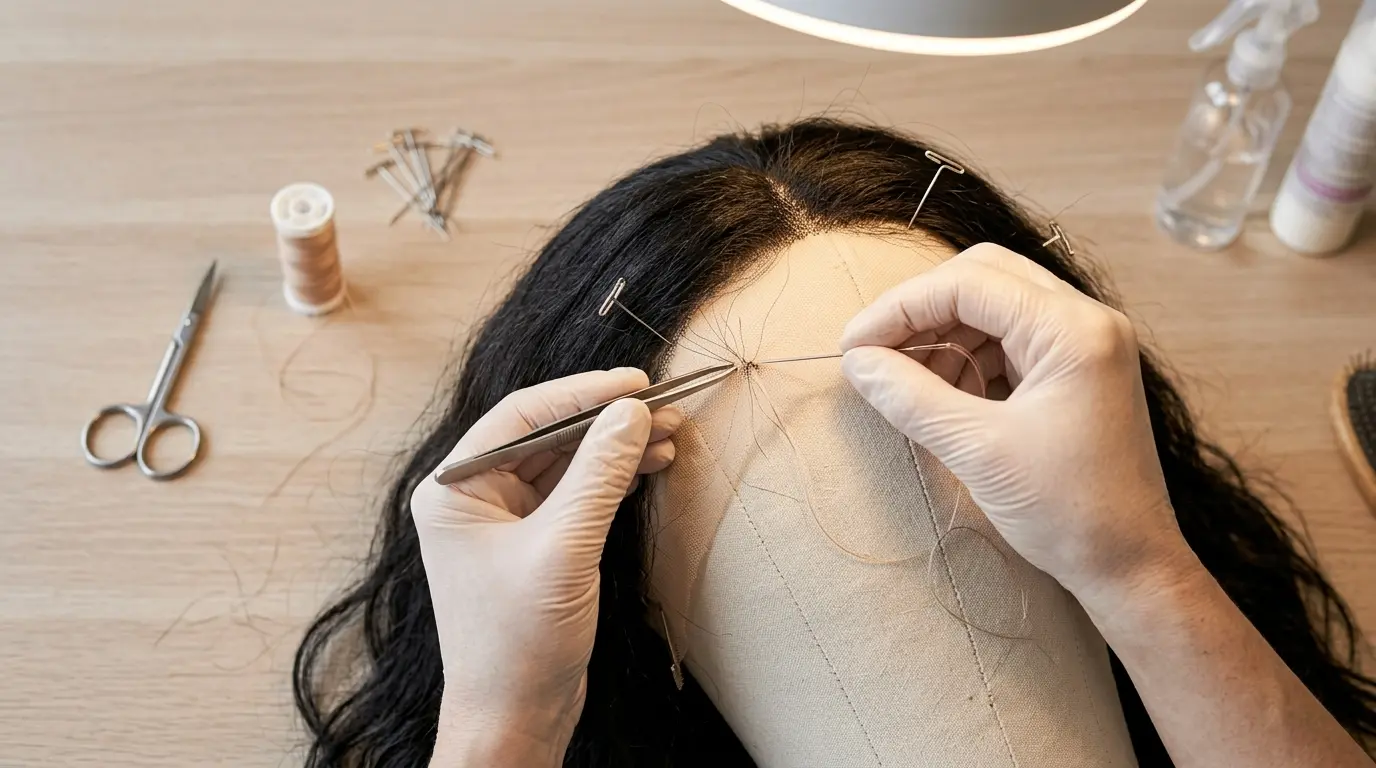
Pin the wig down flat. Secure the unit to your mannequin head with the damaged area facing up and lying flat. Tension in the lace while you sew will cause puckering.
Bring the edges together without overlapping. The two sides of the tear should just meet, like closing a curtain. Overlapping creates a visible ridge under the lace when it is on your skin.
Use a fine whip stitch. Take small stitches perpendicular to the tear, catching only a millimetre or two of lace on each side. Work slowly and keep the stitches close together — roughly two to three millimetres apart. Pull just enough to close the gap; pulling tight is what causes the lace to gather and creates an obvious ripple.
Work around the knots, not through them. Where hair is knotted into the mesh, slide your needle between the knots rather than through them, or you will pull hair out as you go.
Finish with a small knot on the underside and trim the thread short. Any tail on the outside will show.
The finished seam should lie completely flat. If you can see a line, gently release a few stitches and redo them looser.
The Patch Method for Holes
For a hole where there is nothing to stitch together, you are bridging the gap instead.
Cut a piece of matching lace slightly larger than the hole — about half a centimetre of overlap all round. Round the corners of the patch rather than leaving them square, because square corners lift and catch.
Apply a very thin line of lace adhesive around the edge of the patch, not across its whole surface. Excess glue is what makes a repair visible and stiff.
Place the patch on the underside of the wig, so the repair sits between the lace and your scalp rather than on the outer surface. Press gently with a fingertip or the flat of a tweezer, align the mesh so the holes in both layers roughly line up, and let it cure fully — check the product’s guidance, but give it longer than the minimum.
Once dry, flex the area gently. A good patch moves with the lace. If it feels like a stiff plate, there was too much adhesive.
Blending the Repair So It Disappears
A structurally sound repair can still be visible if you stop there.
Once the glue is fully cured or the stitches are done, dust the area lightly with the same tinting powder you use on the rest of the lace so the repaired section matches. If you normally tint your lace with a foundation or lace tint spray, do it after the repair, not before, so the repair takes the colour too.
Check the density around the repair. Sometimes a tear pulls hair out and leaves a slightly bare patch, which reads more obviously than the tear did. Parting your hair slightly differently, or bringing a few strands across, usually handles it.
Then test it. Put the unit on and look in natural daylight from a few angles. Repairs that vanish under bathroom lighting occasionally announce themselves outdoors.
Preventing the Next Tear
Nearly all lace damage traces back to one of a handful of habits.
Slow down at removal. Ripping a glued unit off is the single biggest cause of torn lace, and it is hard on your hairline too. Saturate the edge with a proper adhesive remover, give it time to dissolve the bond fully, then lift — never pull.
Handle the wig by the cap, not the lace. When you pick it up, put it on, or take it off, your hands should be on the sturdy part. The lace is the most delicate component and it is the one everyone grabs.
Leave a margin when you trim. Cutting the lace flush to the hairline removes the buffer zone and puts every bit of stress directly on the knotted area. Our beginner’s lace-cutting guide explains how much to leave and why.
Do not over-pluck one area. Repeatedly removing knots from the same small patch weakens the mesh there. Spread plucking out, as covered in our hairline plucking walkthrough.
Store it properly. Folding a unit with the lace creased, or tossing it in a drawer where it can snag, causes damage between wears. A stand or a satin bag with the lace laid flat solves this, and if you travel with your wigs, our travel storage guide has more.
Be gentle with heat and brushes near the front. Direct heat on lace makes it brittle. Brushes catch in it. Both do their damage slowly, so you notice only when it finally gives.
When to Repair and When to Replace
Repair makes sense when the damage is localized, the surrounding lace still has some give to it, and the hair itself is in decent condition. A single tear on an otherwise good unit is absolutely worth twenty minutes of your evening.
Replace when the lace tears again in a new spot shortly after each repair, when the mesh has gone yellow and papery, or when you find yourself repairing the same wig monthly. At that point you are maintaining something that has already given you what it had.
If your laces keep failing early, it may be worth looking at what you are buying. Ultra-thin films are gorgeous but genuinely fragile, and there is a real spread in quality at similar price points. Sturdier, well-constructed durable HD lace replacements hold up considerably better to daily removal without sacrificing the invisible melt.
Frequently Asked Questions
Can I use super glue to fix torn lace?
It is strongly discouraged. Cyanoacrylate glue dries rigid and brittle, so it cracks as soon as the lace flexes, and it can stiffen or discolour the mesh around it permanently — often making the wig harder to repair properly later. A flexible lace or fabric adhesive is the right tool.
How much does it cost to have a wig lace repaired professionally?
It varies a great deal by region, by how much re-ventilation is needed, and by the shop. Simple stitching repairs are usually modest; anything that requires knotting new hair into replaced lace costs considerably more because it is slow, skilled handwork. It is worth phoning a couple of local wig specialists for quotes before deciding.
Will a lace repair hold up to glue and removal?
A well-executed stitched repair generally handles normal wear. That said, the repaired section will always be slightly less forgiving than untouched lace, so it is sensible to be extra gentle around that spot and consider going glueless on that unit if you can.
Can I replace the whole frontal instead of repairing it?
Yes — replacing a frontal is a standard service and sometimes the more sensible choice when the lace is failing across the board. It is a job for someone experienced, since it involves removing the old frontal and sewing in a new one so the hairline still sits correctly.
Why does my lace keep tearing in the same place?
Almost always a stress point. Look at how you remove the unit, where your fingers land, whether a comb sits directly beneath that spot, and whether you trimmed the lace too close in that area. Fix the cause and the repairs will stop being a monthly ritual.