
Short curly hair has a particular failure mode. The curls themselves look fine — defined, springy, doing their job — but the whole shape sits low and close to the head, so the overall effect is flat on top and wide at the sides.
A diffuser fixes this better than any product, and it does it in about ten minutes. But used the way most people use it, it produces frizz and no extra volume at all. The difference is almost entirely in technique.
What a Diffuser Actually Does
A normal hair dryer fires a concentrated jet of fast-moving air. On curly hair, that jet blasts curl clumps apart — which is exactly how you get a frizzy halo instead of definition.
A diffuser attachment spreads that airflow over a much wider area and slows it down. The prongs do a second job: they hold sections of hair in place while the air passes through, supporting the curl rather than blowing it around.
The volume comes from a third thing. Curls dry into whatever position they are held in. Air dry with your hair hanging down and gravity flattens the roots as they set. Dry with the roots lifted and supported, and they set lifted. That is the whole principle.
Setting Up Before You Dry
Apply product to soaking wet hair. Not damp. Product distributes evenly through wet hair and clumps curls together; on damp hair it goes on patchily and separates strands.
Use something with hold. A gel, mousse or curl cream forms a cast around each curl as it dries, protecting the shape from the airflow. Without a cast, diffusing frizzes hair no matter how careful you are. Fine curly hair does better with mousse; thicker hair can take gel.
Remove excess water with a microfibre towel or cotton T-shirt, squeezing upward rather than rubbing. Terry towelling roughs the cuticle and undoes your work before you start.
Set the dryer to low speed and low or medium heat. Low speed is the important one — high airflow disrupts curls even through a diffuser. Heat should be gentle; there is no prize for drying fast.
Match the diffuser to your hair length. For short curls, a shallower bowl with shorter prongs works better than a deep one, which is designed to hold long lengths.
If you are shopping, top diffusers for curly hair with adjustable heat and a genuine low-speed setting make a real difference — many cheap dryers have a “low” that is still far too strong.
The Hover-Then-Cup Method
There are two phases, and doing them in the right order is what prevents frizz.
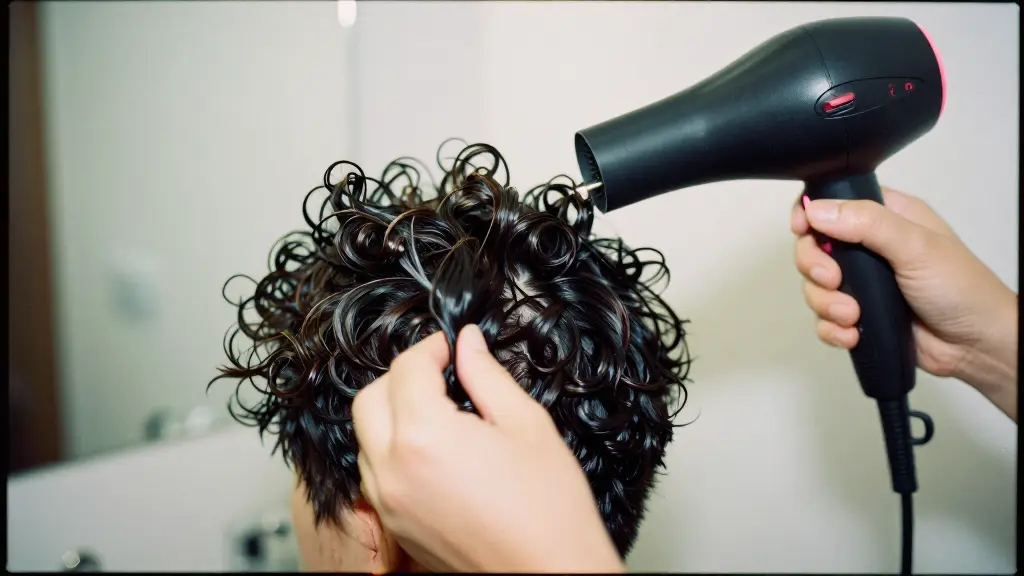
Phase one: hover. For the first few minutes, hold the diffuser near your hair without touching it and let the air dry the surface. This sets the cast on the outside of each curl clump. Once that shell is formed, the curls are protected and you can handle them.
Skipping this phase and going straight to cupping is the most common mistake, because you are physically moving curls that are still soft and reshapeable.
Phase two: cup. Once the hair is around fifty to seventy percent dry and the cast has started to form, begin cupping.
Take a section, lower the diffuser bowl underneath it, gather the curls into the bowl, and lift the whole thing upward toward your scalp. Hold it there for twenty to thirty seconds. Then lower slowly and move to the next section.
The lift is where the volume comes from. You are physically pushing the curl toward the root and holding it in that compressed position while it dries, so it sets short and springy rather than long and drooping.
Work around your whole head systematically — sides, back, top — rather than randomly.
Getting Volume at the Roots Specifically
For short hair, root volume is most of the battle.
Tilt your head. Dry the left side with your head tilted right, and vice versa. This lets the roots on that side fall away from the scalp and set in a lifted position. Flipping fully upside down works too, though it can be awkward on short hair.
Direct air at the roots. Hold the diffuser against your scalp with the prongs in among the roots and let the air lift them from underneath.
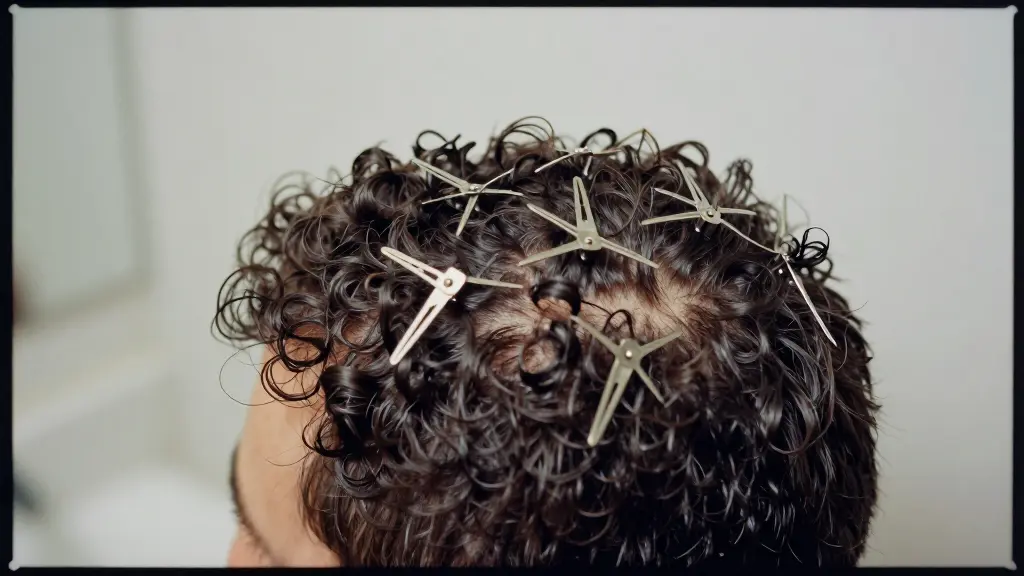
Use root clips. Small metal clips placed at the roots on the crown, propping sections up while they dry, are the single most effective volume tool for short curly hair. Put them in early, dry with them in place, and take them out at the very end.
Do not press the diffuser flat against your head and hold it there. That sets the roots flat, which is the opposite of what you want.
Finishing With Cool Air
When the hair is nearly dry, switch to the cool setting and go over everything again.
This is not a gimmick. Hair sets as it cools, and a cool pass locks the shape in while helping the cuticle lie flat, which adds shine and reduces frizz. On curly hair it noticeably improves how long the style holds.
Then dry it completely. Stopping at ninety percent is a frequent cause of frizz appearing an hour later as the remaining moisture evaporates and curls relax.
Scrunching Out the Crunch
Your hair will feel crunchy. That is correct and it is temporary.
Once it is completely dry, take a tiny amount of oil or serum on your palms — or just use dry hands — and gently scrunch upward through the lengths. The cast breaks and what is underneath is soft, defined and voluminous.
Scrunch while there is any dampness left and the curls will relax and frizz. Wait until it is genuinely, entirely dry.
For extra volume at the very end, tip your head forward, shake gently at the roots, and flip back up.
The Mistakes That Cause Frizz
- Touching curls while they are still wet. Everything before the cast forms should be hands-off.
- High speed. The most common setting error.
- Moving the diffuser around constantly. Cup, hold still, move on. Waving it about is just a hair dryer with extra steps.
- Not enough product. Without a cast, airflow separates curl clumps.
- Brushing afterward. Fingers only.
- Stopping before fully dry.
Between-Wash Volume
Short curls flatten overnight faster than long ones, since there is less weight holding the shape.
Sleep on a satin or silk pillowcase, or in a satin bonnet. In the morning, mist lightly with water and a little leave-in, scrunch, and diffuse for two or three minutes at the roots only. That is usually enough to bring the shape back without a full wash.
Dry shampoo at the roots adds grip and lift on day two or three.
If your curls have gone limp and undefined rather than just flat, our curl washing guide covers the scrunch-and-dry principles in more depth, and the same logic applies to your own hair.
Frequently Asked Questions
Should I diffuse on high or low heat?
Low speed always; low or medium heat depending on your patience. Speed matters more than temperature for frizz, because it is the force of the airflow that separates curl clumps. High heat additionally risks damage over time.
Why does diffusing make my hair frizzy?
Usually because you started cupping and moving curls before the cast had formed, or the speed was too high, or there was not enough hold product to protect the clumps. Hover first, keep the speed low, and use enough product.
How long should diffusing take on short hair?
Typically ten to fifteen minutes for short curls, depending on density. Rushing it with higher heat and speed defeats the purpose, and stopping before it is fully dry causes frizz as the rest evaporates.
Do I need root clips?
They are not essential, but on short curly hair they are the most effective way to build genuine root lift, and they cost very little. Tilting your head while drying achieves some of the same effect if you would rather not use them.
Can I diffuse every day?
Low heat diffusing is gentler than most heat styling, but daily use still adds up. Many people diffuse on wash day and refresh with water and a quick root-only diffuse in between, which keeps the shape without drying the hair out.