
There is a reason your scissors feel heavier than usual right now. Cutting lace is the one step in the whole process that you cannot undo, and everybody knows it. Once that excess is gone, it is gone.
Here is the reassuring part: nearly every beginner mistake comes from cutting too much, too close, or too straight — and all three are avoidable if you know what you are aiming for before you start. Take it slowly and this is a fifteen-minute job with a genuinely dramatic payoff.
Gather Your Tools First
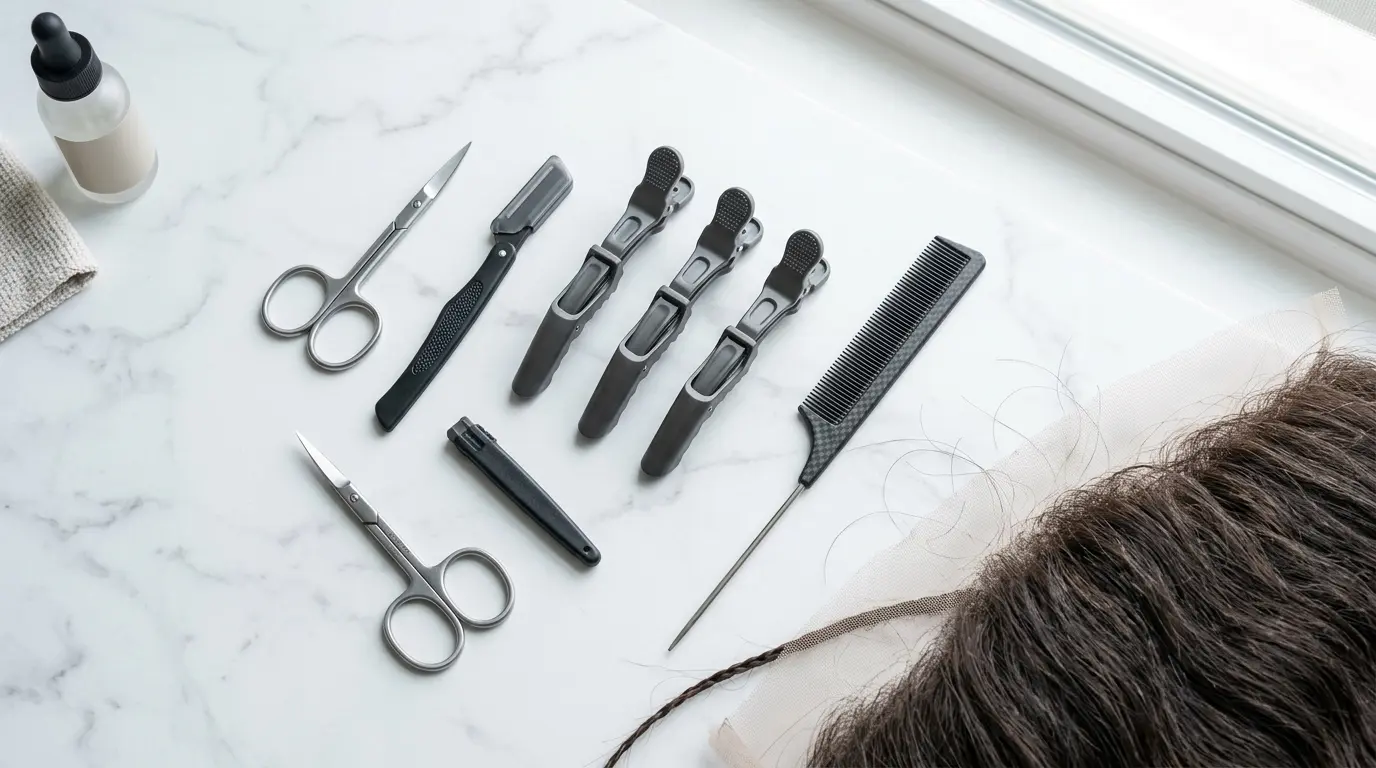
You do not need much, but the right tools make an enormous difference.
- Small sharp scissors. Nail scissors, cuticle scissors or small craft scissors all work. What matters is that they are sharp and the blades are short enough to control. Blunt scissors chew the lace instead of cutting it and leave a ragged, thickened edge.
- An eyebrow razor or dermaplaning blade. Optional but genuinely useful for softening the final edge, because it feathers rather than cuts a hard line.
- A mannequin head or wig stand, if you have one.
- Sectioning clips to keep hair out of your way. This is the tool people skip and then regret, because cutting through stray strands is the second most common beginner mistake.
- A rat-tail comb for precise parting.
- Good light and a mirror you can see clearly in. Bathroom overheads cast shadows that hide the lace edge. Natural daylight is better.
Keep the offcuts. Small pieces of matching lace are exactly what you need if you ever have to patch a tear later, and they are impossible to source afterward.
Positioning the Wig Before You Cut Anything
This is the step that decides whether your cut works, and it happens before the scissors come out.
Put the wig on and secure it. Cutting on a mannequin head sounds easier, but mannequins do not have your hairline. The lace needs to be trimmed to follow your forehead shape, and that only works if the unit is on your head and sitting where it will actually sit.
Prep your hair flat underneath, tighten the straps, and set the unit in its final position. If it moves after you cut, your carefully shaped edge will no longer match anything.
Find your real hairline. Raise your eyebrows and look at where the skin creases. Your natural hairline is generally a little above the highest crease — roughly three to four fingers above your eyebrows for most people, though this varies a lot and yours is whatever yours is. Placing a wig too far forward is the single most common beginner error and it makes even a perfect cut look wrong.
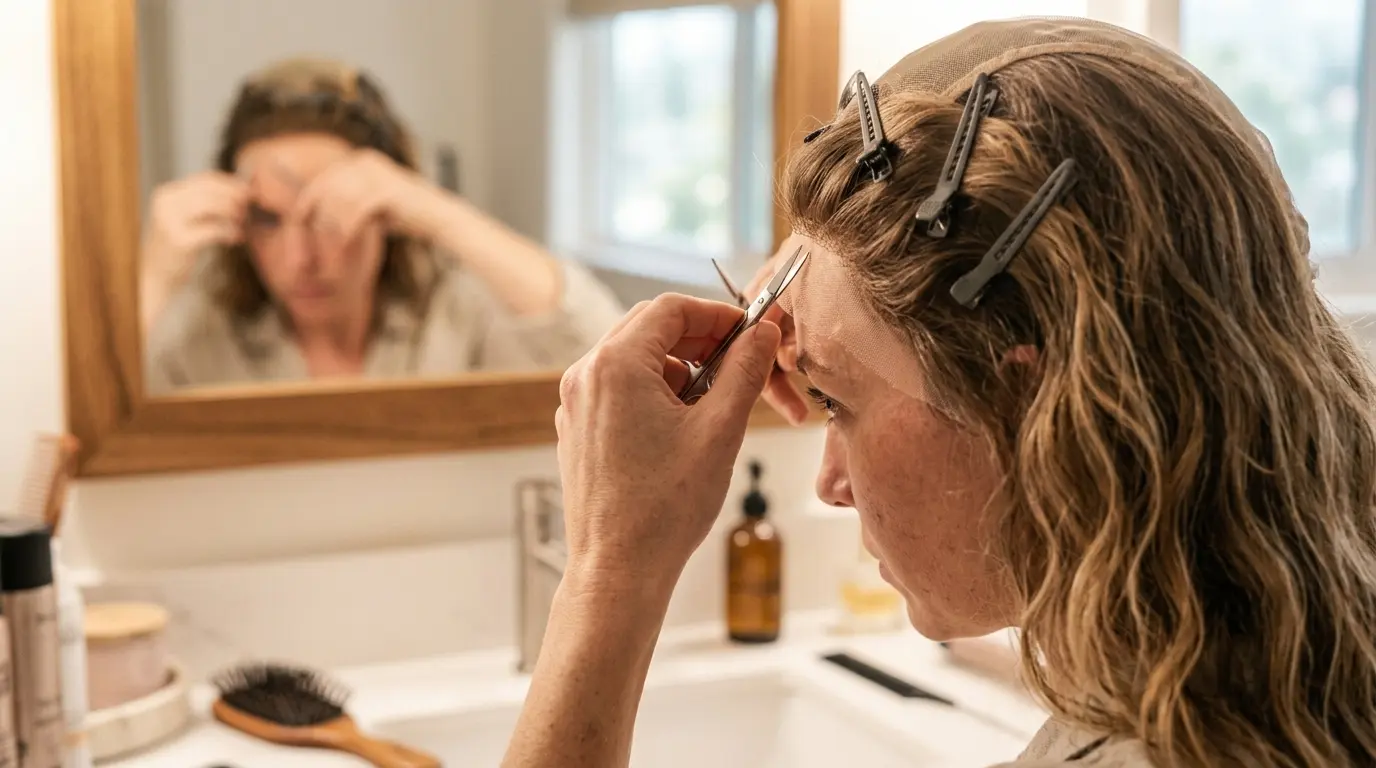
Clip all the hair back. Every strand. Use the rat-tail comb to part off the front section, clip it away from the lace, and check twice. Scissors do not distinguish between lace and hair.
Mark your line if it helps. Some people lightly trace along the lace with an eyebrow pencil where they intend to cut. It washes off and it takes the guesswork out.
The Zigzag Cut That Avoids a Hard Line
Now the actual cutting, and there are two rules that matter more than anything else.
Rule one: leave a margin. Do not cut flush to the hairline. Leave two to three millimetres of lace beyond where the hair starts. That small strip is what lets the edge lie flat and blend into skin, and it also keeps stress off the knotted area. Cut flush and you get a visible hard border, a fragile edge that tears easily, and hair that appears to start out of nowhere.
Rule two: never cut straight. A straight cut produces a straight line, and human hairlines are not straight. Instead, cut in a small zigzag — tiny angled snips, alternating up and down, moving along the edge. The peaks and valleys should be shallow, just a couple of millimetres deep. This scattered edge is what makes the lace blur into skin instead of announcing itself.
Work in small snips. Not long confident cuts. Tiny snips, moving along the edge a few millimetres at a time. It feels slow. It is supposed to.
Follow the curve of your hairline. Your hairline dips and rises. So should your cut. Do not impose a shape on it.
Start conservative. Cut further out than you think you need on the first pass, then come back and refine. You can always take more; you cannot put it back.
Work from one temple across to the other in one direction so the edge stays consistent, rather than jumping around.
Fine-Tuning Around the Temples and Ears
The temples are where most cuts go wrong, because the hairline changes direction and people keep cutting in a straight line past the corner.
Follow the natural recession at each temple. Most people have a slight indentation there, and your cut should trace it rather than cutting across it. Take extra care and extra time on these two corners.
Around the ears, trim the lace so it sits behind the ear rather than in front of it, and leave enough that the tab lies flat. Lace that is trimmed too short here lifts and shows.
At the very front centre, that is where the shallowest zigzag should be, because it is the most visible area.
Once you have the shape, run the eyebrow razor lightly along the outer edge at a low angle. This feathers the very edge of the lace, softening any remaining hard line. Barely any pressure — you are grazing, not shaving.
Tinting and Blending the Cut Edge
Cutting is only half the job. An uncoloured lace edge will still cast a faint shadow against your skin no matter how well you shaped it.
Tint the lace so it matches your skin tone — foundation stippled on from the underside, a dusting of matching setting powder, or a purpose-made lace tint spray. Build it in thin layers and check in daylight rather than under bathroom lighting.
Then set the edge down. A light-hold mousse worked along the lace edge, pressed flat, and held in place with a wide elastic band for fifteen to twenty minutes while it dries is what gets the lace sitting truly flat against your skin.
Finish with baby hairs. A small amount of fine hair pulled from the very front, shaped softly, breaks up the line further and does more for realism than almost anything else. If yours refuse to stay put, our guide on laying stubborn baby hairs has the fix.
Mistakes That Are Hard to Undo
Learn from other people’s rather than your own:
- Cutting flush to the hairline. The most common and the least fixable. Always leave that small margin.
- Cutting in a straight line. Produces an obvious border. Always zigzag.
- Cutting on a mannequin. The shape will not match your head.
- Cutting before positioning. If you move the wig afterward, the shape is wrong.
- Cutting hair by accident. Clip everything back, twice.
- Cutting too much at the temples. These corners cannot be repaired.
- Using dull scissors. Ragged edges show.
If you do cut too close, all is not lost — a heavier concentration of baby hairs at that spot, careful tinting, and positioning the unit very slightly further back can disguise a lot. It is a rescue, not a fix, but it usually works well enough.
If You Would Rather Not Cut at All
There is no shame in skipping this step entirely. It is genuinely nerve-racking the first time, and a unit is a real investment to be practising on.
Plenty of wigs now arrive with the lace already trimmed and shaped, which removes the risk and gets you out the door faster. If you are new to lace, or simply do not want to spend an evening with scissors near a wig you love, ready-to-wear lace fronts are a sensible place to start. Many of them come with the knots lightened and the hairline pre-thinned as well, which handles three of the trickiest jobs at once.
You can always learn to cut later, on a less expensive unit, with nothing riding on the outcome.
Frequently Asked Questions
Should I cut lace wet or dry?
Dry, always. Wet lace stretches and clings, which distorts the shape you are cutting and gives you an edge that does not match once it dries. Make sure the wig and your skin are both completely dry before you start.
How much lace should I leave beyond my hairline?
Around two to three millimetres. Enough that the lace can lie flat and blend into skin, but not so much that there is an obvious sheet of mesh on your forehead. Beginners should err on the generous side, since you can always trim more.
Can I cut lace with regular hair scissors?
You can, but small scissors give far better control on a curved edge, and short blades make it much harder to take off too much in one snip. Whatever you use, it must be sharp — dull blades leave a chewed edge that shows.
What if I cut the lace crooked?
Even it out by trimming the fuller side down to match, working in tiny snips, and be aware that you are shortening the overall margin as you go. If it ends up very short, tinting and a heavier concentration of baby hairs along that section will disguise most of it.
Do I need to cut the lace at the ear tabs too?
Yes, trim the lace at the ear tabs so it sits flat and tucks behind the ear rather than bunching in front of it. Leave enough that the tab lies smooth against your skin — cut too short here and the corner will lift.